|
|
|
|
|
flannel rag quilt |
back to make |
|
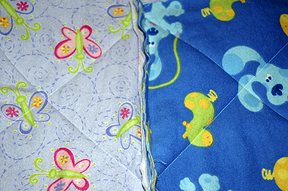
My mother-in-law is a phenomenal quilter and one day she whipped up a beautiful rag quilt for us (she can make a rag quilt in her sleep). It's made of flannel and gets softer and more loved with time. It is also just about the simplest quilt you can make - which is a perfect project for me to try! I like to make them as gifts for children or babies because they are warm and soft. Plus, today's flannels come in so many fun colors and patterns. |
|
|
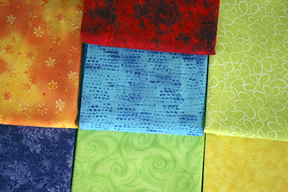
The first thing to do is plan the size of the quilt and the size of your blocks. I made Lizzie's quilt 42x42 inches with 6-inch squares, so 7x7 blocks. Each square would have two pieces of fabric with an additional inch for a half-inch margin or 7-inch squares. I decided on 7 patterns giving me 14 squares of each fabric. The best part is going to the store to select the fabrics! [NOTE: Dear visitor, I am so happy that you want to try your hand at making a rag quilt. However, I have received more emails than I care to count asking me how much fabric is needed to make the quilt without including the size of the desired quilt or the number of fabrics being used. A little math is *very* good for you. Here is what you need to figure out for yourself: a) how big is the final quilt? b) how many fabrics? c) how big is each final square? d) how much margin do you want (no less than a half-inch, I'd say)? Keep in mind that not all fabrics are the same width (some are 44" or 45" or 60"). If you need more assistance, I encourage you to ask the nice people at the fabric store who get paid to help you. Good luck!!] |
|
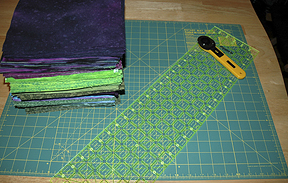
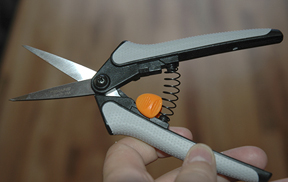
Handy equipment: a rotary blade cutter, a rotary mat, a rotary ruler, and not pictured: sewing machine with a walking foot, seam ripper, Fiskars rag quilt scissors (I'll explain why these are so good), laundromat, pins, good cotton quilting thread, and 100% cotton batting. |
|
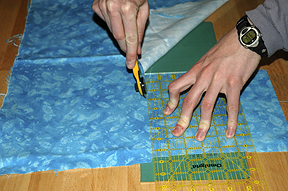
I photograph my fabrics and then piece the quilt together on the computer to get an idea of the layout. Although most quilts recommend washing the fabrics before quilting, in the case of rag quilts you DO NOT want to wash the flannel before assembly. Instead, just iron the fabric and start cutting your squares. |
|
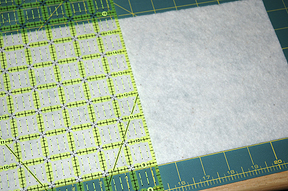
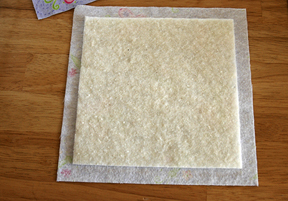
The batting squares go between your two layers of fabric. They should be smaller than your fabric by two times your intended seam allowance plus a half inch. So... if my fabric is 7x7 inches and my seam allowance is a half inch, then I want my batting to be 5.5x5.5 inches. Don't make your seam allowance any less than a half inch, or else you won't have anything to rag. |
|
When your squares are ready, create a sandwich with two pieces of fabric as the bread and your batting as the filling. Try to put the batting someplace in the center. |
|
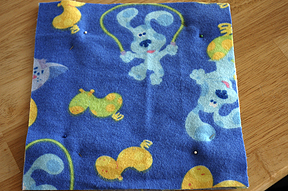
Top the sandwich with the second piece of fabric (just a reminder, we want the right side of the fabric facing outward). Because I am a lousy sewer, I like to pin the corners to reduce risk of disaster before I sew. |
|
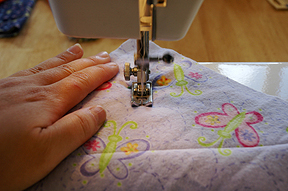
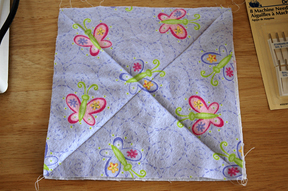
Quilt each square by sewing an X across the sandwich from corner to corner. I am assuming you have already tested the right tension and have most of your sewing machine disputes behind you by now. |
|
It should look something like this. |
|
Next you want to sew your squares together in strips. Refer to your pattern, place the proper squares together and sew one side together. I used a half inch seam allowance. Remember to have all of the seams facing the same direction. |
|
Once your strips are done, pin two strips together. Pinning and a walking foot on your sewing machine are especially handy for larger rag quilts. Ask me how I know this... I had to rip seams several times before I realized that without a walking foot, the flannel slipped against itself and I came up with an inch of mismatch by the end of each strip. |
|
I also like to pin the seams flat like this. It is just personal preference. You can sew it flat over if you like because in the end, it will all get cut up. |
|
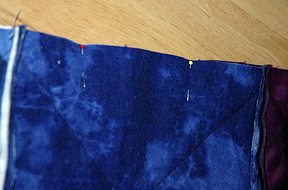
After all of the strips are sewn together and your quilt begins to look like a real blanket, you want to sew the same seam allowance around the border of the entire quilt. |
|
These spring-loaded, super sharp, rag quilt scissors are just about the best invention in the world. At least, you will feel this way if you have ever tried to rag a quilt with normal scissors. Please be careful, these are very very sharp. |
|
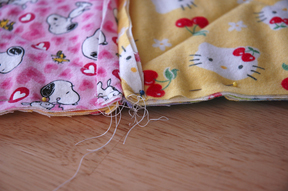
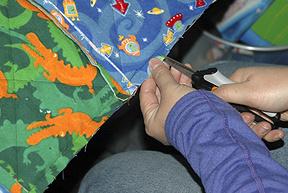
Your mission is to make cuts in the seam allowances (all of them) every quarter inch, as close to the seam as possible without cutting it. If this is a large quilt, please do not try to cut it all in one sitting. Your hand will hate you for it, and you might hate yourself for it too. |

|
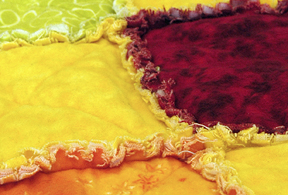
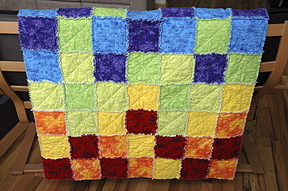
When you are done cutting the frays, it is time to wash the quilt. BUT WAIT! Save yourself a mountain of grief and take it to a laundromat. Normal household washers and dryers cannot handle the volume of lint and frayed bits that will come off this innocent looking quilt, but industrial machines can and do. This advice comes from many a veteran quilter. This is the quilt I made for my niece. |
|
The fringes should be nice and fluffy looking (which is why they suggest not washing the flannel before quilting). The more you wash it, the softer and fluffier it gets. From now on, it can be washed in a conventional (home) machine, but be sure to check the lint screen when drying. |
|
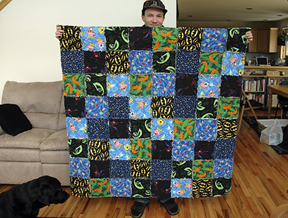
Here is the quilt I made for my nephew. |
|
This is a quilt I made for my friends' new baby girl. |
|
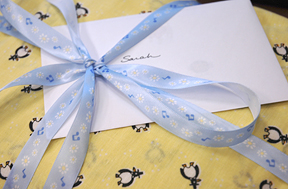
A little extra fabric is easily turned into a gift bag for the rag quilt. |
|
|
back to make |
